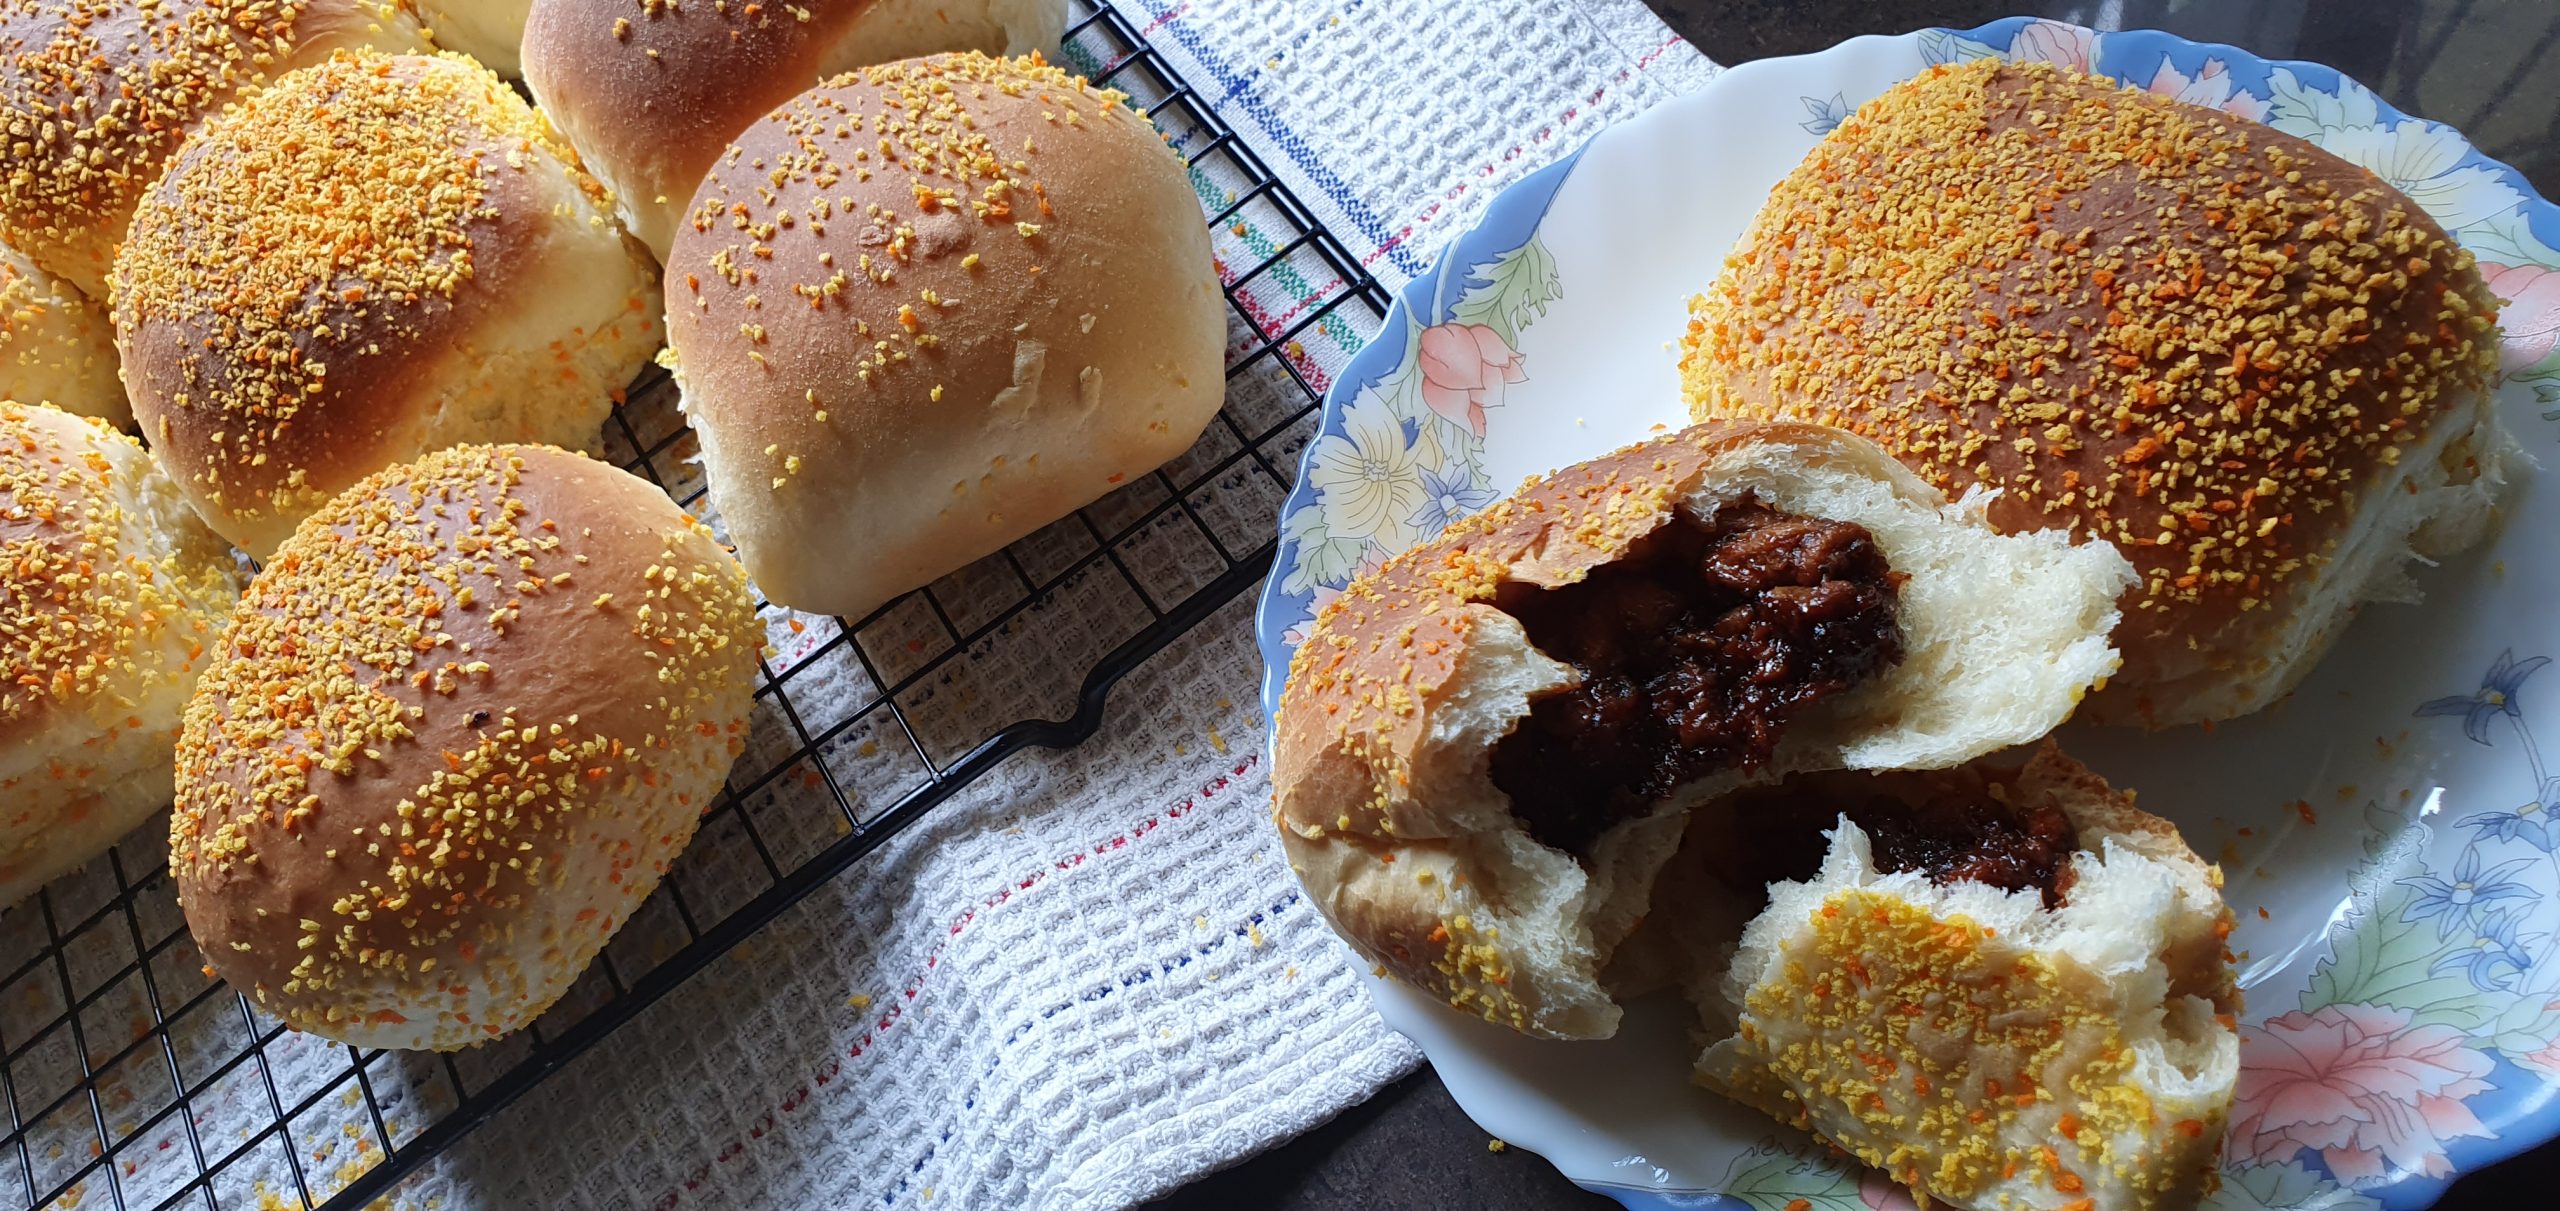
When I posted the Chicken Adobo I made the other day, I used the hashtag #filipinofood. Subsequently, I was followed by @sarapnow, an Instagram account featuring various Filipino dishes. I figured this is the best way to build my exposure to Filipino cuisine, so I started following the account as well. One day, I saw them post a pic of asado pandesal, a type of baked meat bun. Juicy meat wrapped in fluffy bread rolls? YES!
Following this, I began researching for recipes. Apparently, you can make asado as a standalone dish eaten with steamed white rice, and pandesal separately as a plain bread roll. Chop up the asado into smaller pieces and throw in some cornstarch slurry to thicken, and you have a flavorful filling for your meat buns.
With this in mind, I drew inpiration from separate recipes. The pandesal recipe was from Woman Scribbles, which I have modified for the Kenwood BM450 bread machine. It took me some eyeballing and adjustments to get the liquid-to-flour ratio right, and I think I managed to find the sweet spot here. The recipe for the asado filling was from Panlasang Pinoy Meat Recipes, but I used chicken instead of pork, and wrapped the filling in pandesal instead of steamed buns.
I read somewhere that coating the pandesal with breadcrumbs makes it more authentic. I just used the packet of breadcrumbs I got from Bake With Yen, but in retrospect I think they were a tad too coarse. Next time I’ll blitz them briefly in the grinder for finer breadcrumbs.
Guys, these were seriously good. The buns were crispy on the outside and super fluffy on the inside, and would make amazing dinner rolls on their own. For my next dinner party I think I’ll use this recipe minus the filling, divided into 30 for just the right size. The asado filling was really flavorful and juicy, making these buns a great breakfast option or late afternoon snack. Highly recommended!
Chicken Asado Pandesal
Ingredients
For the filling
- 3 tablespoons cooking oil
- 1 medium onion, finely chopped
- 6 cloves garlic, minced
- 650 grams boneless chicken thighs or breasts, chopped
- 1 1/2 tablespoons light soy sauce
- 1/2 tablespoon dark soy sauce
- 1 tablespoon oyster sauce
- 1 tablespoon hoisin sauce (optional)
- 2 tablespoons brown sugar
- 1 star anise
- 1 bay leaf
- 2 1/4 cups water
- 2 tablespoons cornstarch
For the buns
- 300 ml full cream milk
- 70 grams (1/3 cup) cooking oil
- 2 eggs
- 620 grams bread flour
- 120 grams sugar
- 1 teaspoon salt
- 1 1/2 teaspoons instant yeast
Step by Step
The Asado Filling
Make the filling. In a skillet over medium high heat, heat the oil.

Add the onions and garlic and cook, stirring frequently, until onions are soft and transclucent, 3 minutes.

Add the chicken and cook, stirring, until starting to brown, 5 minutes.

Season with the soy sauce, oyster sauce, star anise, bay leaf and sugar.

Add 2 cups of water and stir to combine.

Bring the mixture to a boil, then reduce heat to low and simmer, until meat is very tender, 20 minutes.

Whisk the cornstarch into the remaining 1/4 cup water.

Add the cornstarch slurry into the pan, and stir until mixture has thickened.

Spread the filling in a large tray, and set aside to cool. Discard the star anise and bay leaf.

The Pandesal
Make the buns. In your breadmaker pan, add the milk, oil, and eggs.

Then, add the flour, sugar, salt, and yeast.

Transfer the pan to the breadmaker, and start the Dough program. After 10 minutes of kneading, observe the dough. If the dough is still sticking to the sides, add additional flour a tablespoon at a time, until the dough pulls apart from the sides and gathers into a ball in the center of the machine.

At the end of the Dough program, the dough should have doubled in size. On the Kenwood BM450, this will take 1 hour 30 minutes from start to finish.
For those using a stand mixer, add all the ingredients to your stand mixer bowl. Mix at Speed 1, until a shaggy dough forms. Then, increase to Speed 2 and knead, until dough is smooth and elastic, 15 to 18 minutes.
Assembly
Transfer the dough to a lightly flour-dusted or oiled surface. Personally, I find using oil works better for pandesal, as it helps the breadcrumbs to stick better at a later step.

Divide the dough into 20 equal-sized pieces.

Working with one piece of dough at a time while keeping the rest covered to prevent them from drying out, shape the dough into a ball.

Roll the dough into a disc, leaving the center thicker and the edges stretched out thinner.

Put 1 heaping tablespoon of filling in the center of the disc.

Gather the edges over filling, and pinch to seal.

Shape into a smooth ball.

Roll the bun in the breadcrumbs to coat. You can just coat the top if you like.

Shake off any excess breadcrumbs and place, seam-side down, in a baking tray lined with a baking sheet.

Cover and let rest, another 1 hour.

About 15 minutes before baking, preheat the oven to 180 degrees C (fan 160 degrees C). Place your oven rack on the bottom rung.
Transfer to the oven and bake, until lightly browned, 18 to 20 minutes.

Let cool on a wire rack. Enjoy!


Leave a Reply