I was browsing through my photo gallery looking at my Bali holiday photos, when I came across a photo of the pie susu (milk pies) we got as ole-ole (souvenirs) from there.
Suddenly I had a craving for pie susu, so as always, nak makan, buat sendiri. I looked at a few recipes on Youtube that seem to get good reviews, and after a couple of tries I found one by Nyonya Liem to be the right one for me. The recipe is well-written with exact measurements, the filling to pastry ratio was spot on with no wastages, and I particularly liked that it uses more premium ingredients and doesn’t cut corners.
The Learning Curve
Making the first batch of pastry dough was a bit messy, I used the wrong beater and way too many utensils than necessary. The second batch, however, was a lot more streamlined and efficient; I only needed one mixing bowl for my stand mixer, and a large measuring jug for the filling. I also got a lot better at shaping the shells, and the wooden tart press I got was super helpful. Many thanks to sous chef Mummy for helping me clean up the edges of the tart shells after I pressed them.
The first time I attempted this, the 15- by 11-inch trays I had was short by just an inch, a bit too narrow to fit 4 rows of 5 tart moulds. As a result, I had to bake them in so many batches. After this first attempt, I went and bought 15- by 12-inch trays. Perfect.
When they came out of the oven, the pie susu looked good and smelled so fragrant. They slipped out of their moulds easily and had a nice golden color. I was fasting, so I had to wait until sundown before I could have a taste. I was super pleased with the result; the pastry was crumbly and the filling was just right, creamy and not too sweet. Exactly as how I remember the ones from Bali.
I toasted these in the air fryer for sahur the next morning, and that took them to the next level. Definitely best enjoyed warm. Yum!
Jump to RecipeThe Pie Pastry
Make the pastry. In the bowl of your stand mixer, add the margarine, butter blend, flour, and salt.

Using the beater attachment, mix at the lowest speed, until the mixture resembles coarse breadcrumbs.

While the mixer is mixing, in a separate container, add the iced water, eggs, milk, sweetened condensed milk, and milk paste if using. Mix to combine.
Continuing at the lowest speed, pour the liquid mixture into the mixing bowl. Mix until just combined and a dough is formed. Be careful not to overmix.
Divide the dough into 18-gram pieces. You should end up with 48 pieces. Roll each piece of dough into a ball.
Arrange the moulds in a baking tray.
Arrange the dough balls in the center of each mould. Use your fingers to press it down into the base, pushing it toward the edges. Let rest, in the fridge is possible, 1 hour.
After resting, using a flour-dusted tart tamper, push down into the center and work your way out toward the sides. Use the smaller end of the tamper to press the dough firmly into the corners and up the ridges.
Let rest again in the fridge, another 30 minutes.
The Susu Filling
While the shells are chilling, make the filling. In a large mixing bowl, add the milk OR water, sweetened condensed milk, sugar, egg yolks, vanilla extract, milk paste if using, cornstarch, and salt.
Beat gently, until throughly combined the sugar is dissolved. Mix gently to prevent any bubbles from forming.
Let rest before proceeding with the next step, 30 to 60 minutes. Resting the mixture allows the sugars to fully dissolve and give the filling a caramelized finish along the edges when baked.
Using a fine mesh strainer, strain the mixture. Repeat this step twice for best results.
Assembly and Baking
Preheat the oven to 170 degrees C, fan off. Place the rack on the bottom rung of the oven.
Using a fork, prick the bottom of each pie shell. This will prevent the crust from puffing up when baking.
Blind bake the shells in the oven, until the edges are set and the crust is pale golden, 15 minutes. Remove from the oven, and reduce the temperature to 160 degrees C.
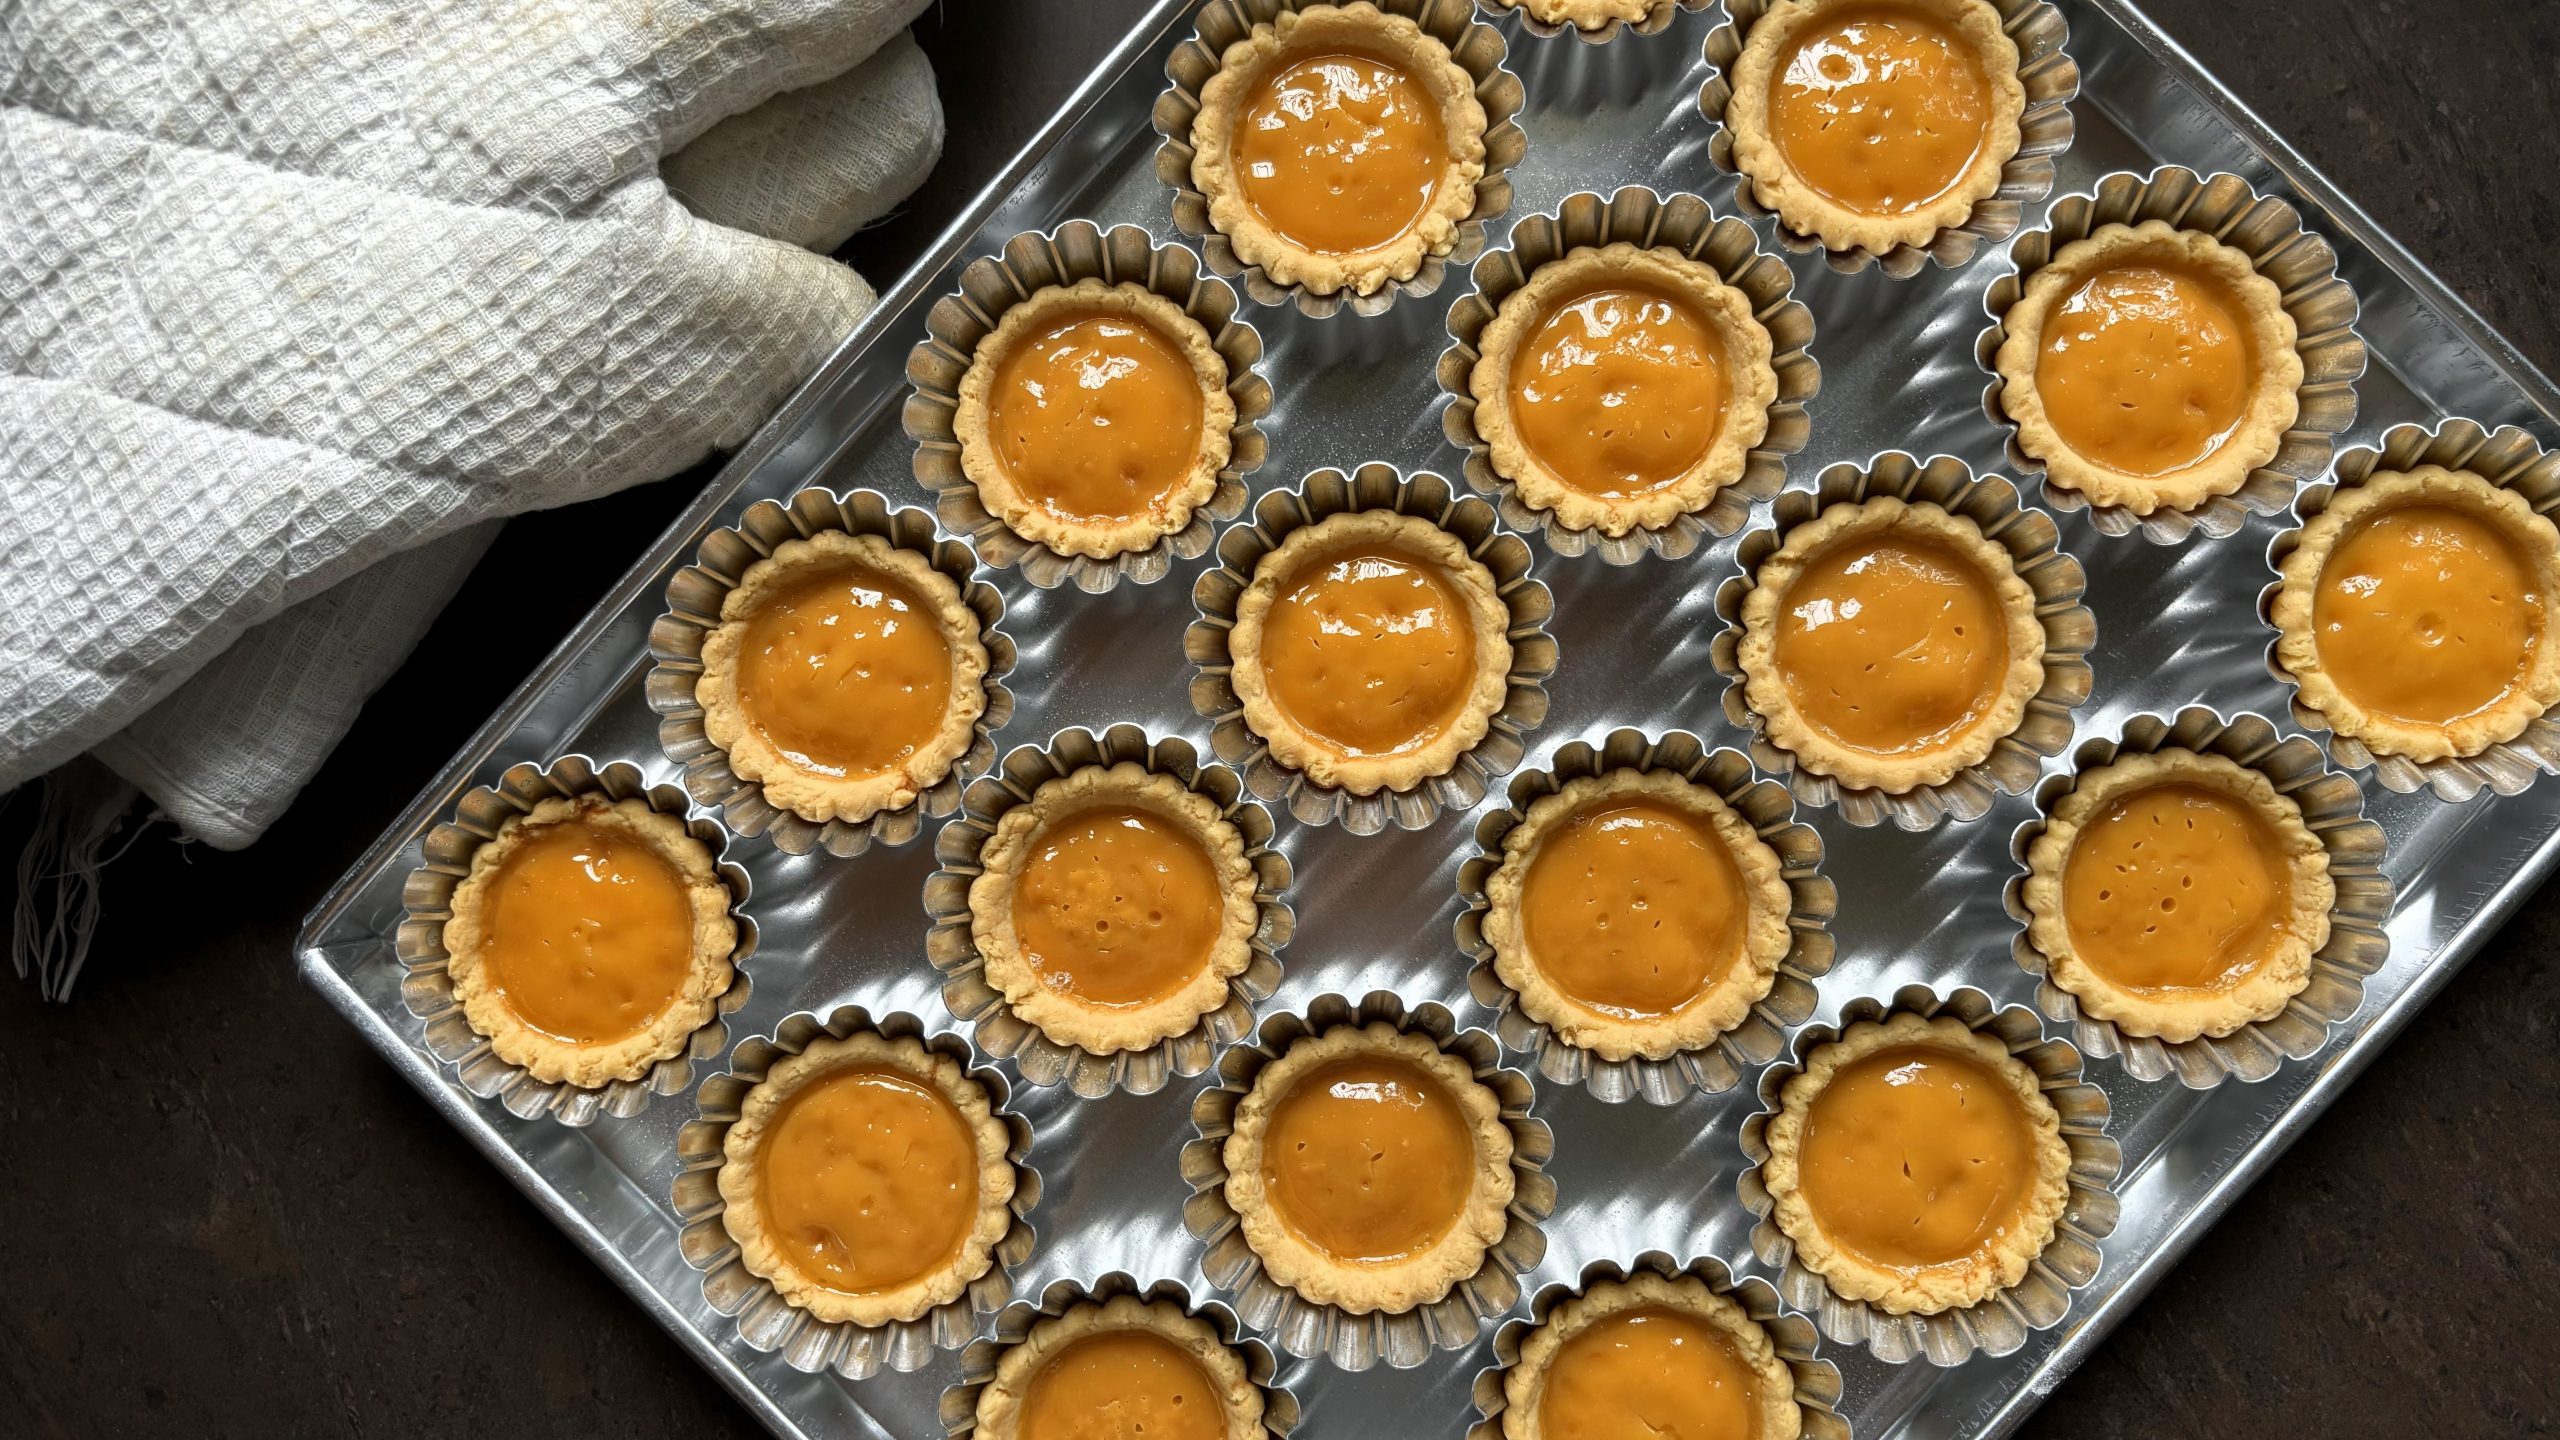
Skim off any foam from the filling mixture. Ladle the filling into the tart shells, about a tablespoon each. You should have just enough filling, with no leftovers.
Bake in the preheated oven, until slightly caramelized around the edges of the filling, about 45 minutes.
Pie Susu Bali
Equipment
- 48 egg tart moulds 7.5 cm diameter
- 2 baking trays 15- by 12-inch
Ingredients
For the pastry
- 200 grams margarine softened
- 50 grams Buttercup (butter blend) softened
- 500 grams pastry flour 8% to 9% protein
- 1 teaspoon salt
- 55 grams iced water
- 75 grams eggs beaten
- ½ teaspoon sweetened condensed milk
- 1 teaspoon milk paste/emulco optional
For the filling
- 260 grams full cream milk OR 250 grams water
- 250 grams sweetened condensed milk
- 80 grams castor sugar
- 125 grams egg yolks from about 7 eggs
- 1 teaspoon vanilla extract
- 1 teaspoon milk paste/emulco optional
- 20 grams cornstarch
- ⅛ teaspoon salt
Instructions
- Make the pastry. In the bowl of your stand mixer, add the margarine, butter blend, flour, and salt.
- Using the beater attachment, mix at the lowest speed, until the mixture resembles coarse breadcrumbs.
- While the mixer is mixing, in a separate container, add the iced water, eggs, sweetened condensed milk, and milk paste if using. Mix to combine.
- Continuing at the lowest speed, pour the liquid mixture into the mixing bowl. Mix until just combined and a dough is formed. Be careful not to overmix.
- Divide the dough into 18-gram pieces. You should end up with 48 pieces. Roll each piece of dough into a ball.
- Arrange the moulds in a baking tray [See Note 1]. Arrange the dough balls in the center of each mould.
- Use your fingers to press it down into the base, pushing it toward the edges. Let rest, in the fridge is possible, 1 hour.
- After resting, using a flour-dusted tart tamper, push down into the center and work your way out toward the sides. Use the smaller end of the tamper to press the dough firmly into the corners and up the ridges.
- Let rest again, in the fridge if possible, another 30 minutes.
- Next, make the filling. In a large mixing bowl, add the milk or water, sweetened condensed milk, sugar, egg yolks, vanilla extract, milk paste if using, cornstarch, and salt. Beat gently, until throughly combined the sugar is dissolved. Mixing gently prevents any bubbles from forming.
- Let rest before proceeding with the next step, 30 to 60 minutes. Resting the mixture allows the sugars to fully dissolve and give the filling a caramelized finish along the edges when baked.
- Using a fine mesh strainer, strain the mixture. Repeat this step twice for best results.
- Preheat the oven to 170 degrees C, fan off. Place the rack on the bottom rung of the oven.
- Using a fork, prick the bottom of each pie shell. This will prevent the crust from puffing up when baking.
- Blind bake the shells in the oven, until the edges are set and the crust is pale golden, 15 minutes. Remove from the oven, and reduce the temperature to 160 degrees C.
- Skim off any foam from the filling mixture. Ladle the filling into the tart shells, about a tablespoon each. You should have just enough filling, with no leftovers.
- Ladle the filling into the tart shells, about a tablespoon each. You should have just enough filling, with no leftovers.
- Bake in the preheated oven, until filling is set and slightly caramelized around the edges, about 45 minutes.
Notes
- The size of the tray I used was 15- by 12-inches, which fits 20 7.5cm moulds. I ended up baking in 3 batches, two trays of 20 plus one small tray of 8.
- To reheat before serving after the pies have cooled down, toast in an air fryer or toaster oven at 160 degrees C for 3 minutes.
Leave a Reply